Looking for Something?

Monday, February 28, 2011

Raw Milk Restrictions

By Michael

Most of you are probably aware that the FDA has been cracking down recently on raw milk distribution across the country. I was pleased to read this article yesterday at naturalnews.com about various states that are actually going against the FDA's advice and easing restrictions on raw milk. This article says that "Texas, Oregon, Minnesota, New Jersey, Massachusetts, and Wisconsin all have pending legislation to legalize raw milk sales, relax sale restrictions that make buying the product difficult, or for the first time decriminalize raw milk sales with restrictions."

We have talked about raw milk on our site in the past and one of our contributors, Dale Johnson, is a Farm Management Specialist and Master Gardener for the University of Maryland Extension. A lot of the work he does with the University of Maryland is with local Dairy Farmers so he has a great perspective on this debate. Read his series of articles on the Good, Bad, and the Ugly of raw milk for more of his perspective.

So what do you all think. Is the FDA right in restricting raw milk distribution, or are some of the above States right in relaxing restrictions. Let your voice be heard.

Saturday, February 26, 2011

Inspiration

Design Sponge's re-purposed window into a cold frame

 This 4 berry salad recipe from Martha Stewart. I can't wait to have berries growing.

Short on gardening space? Grow your plants in your table and chairs with FurniBloom

This book... I want to read it. Have you read it yet? 


Friday, February 25, 2011

Indoor Garden Box............ FAIL

by Michael

(After 2 months)
Sometimes the best part of gardening is the dreams. It is the time before you plant and work when you think of all the beautiful fresh vegetables and fruits that you will harvest in the future. We received an indoor garden box through a trade this last December and we had wonderful dreams of Spinach, Carrots, Onions, and Cilantro dancing through our heads. We thought about the nice spinach salad we would be able to partake of without going to the grocery store. Alas, sometimes dreams are just that, dreams.

We planted and toiled over our garden the last two months (well, we really didn't toil) and this is what we received. Some measly spinach leafs and a miniature radish. The plants are long and stringy and aren't filling out. According to the guy that gave us the box, he said we would have spinach within 3 weeks. This has been an INDOOR GARDEN BOX FAIL.

One measly radish
As gardeners, we are used to failure. There are many things that can cause failure, some in our control, and some out of our control. The key is to keep trying, keep moving forward. We are still determined to have our Spinach from our indoor garden box. Marisa believes our plants our stringy because the light is too far away, and they spent all of their energy trying to get closer to the light. We will try again with the light closer and maybe two months from now I can sit down to a nice spinach salad. If not, we will do more research and try again. That is what a gardener does.

Do you all have any suggestions on what might have caused our failure. Any help would be greatly appreciated.

Thursday, February 24, 2011

New Seeds

Michael

We received our seeds from the seed saver exchange in the mail this weekend. We have a lot of seeds that we have collected from our heirloom plants the last few years so we didn't have to buy all of our seeds. However, we are excited to expand our garden this year and so we ordered some new seeds that we have never tried before. Here are a couple of the new seeds we ordered.

Dr. Wyche's Yellow Tomatillos

We have never grown tomatillos before. From the research I have done, they grow very similar to tomatoes and there isn't a lot different you have to do. You may ask why we decided to do tomatillos. I love authentic mexican food and a large portion of our monthly grocery budget goes to green tomatillo salsas and sauces. I decided that rather than continue to spend money on store made sauces, we could grow our own tomatillos and can our own tomatillo salsa. The description for these tomatillos says they have a delicious sweet flavor, they are very prolific and easy to grow. I am so excited to try these and see how it works out.


Bloody Butcher Corn

As Marisa and I have considered what we can do to become more self sufficient we have thought about what we are going to do for flour and bread. We have a lot of wheat in our food storage but we would like to supplement this with flour we can grow on our property. Rather than try to grow wheat we decided to grow corn and use it to make cornmeal. We chose this corn because it is drought tolerant (we live in the high desert of Utah) and it's dried kernels can be used for making flour or corn meal. I look forward to making tamales next fall with cornmeal from our yard and smother them with green tomatillo sauce from our garden.

What are you planning to grow in your garden this year. Let us know, we are excited to hear what everyone else is doing.

Wednesday, February 23, 2011

Tuesday, February 22, 2011

Chicken Coops on the Cheap

Yesterdays post talked about a few of the different styles of chicken coops, and today I want to talk about how to build a chicken coop frugally.

Here are a few of my idea, please leave comments with your own ideas.

Dog House
Dog food, Jasmine, and Power Ranger were our first three chickens and their coop was a plastic dog house.


Recycle
Our second chicken coop was made from a neighbors old fence that they were tearing down. For the rest of the supplies it only cost us $50-$75.
Habitat for Humanity-ReStore
This chicken coop was built from supplies found at the Habitat for Humanity Re-Store.


Wood Pallets
Most of the time you can find wood pallets for free. Pull the wood apart for use, or even connect the pallets to make three sides of your structure and cover the sides with plywood and add a roof.
Classifieds & Craigslist
Check the classifieds for used sheds, coops, or even lumber.
Here is one coop that is listed in my local classifieds for just $100
Be Creative
Yesterday's post had a few creative ideas like using the back of a car or little tykes play house. I'm sure there are tons of other ideas you could come up with.

I know there are more ideas out there, leave a comment!

Monday, February 21, 2011

Chicken Coops

Our chickens give us eggs, meat, and great entertainment.  In return, we want to provide them with the things they need.  When it comes to chicken coop designs, the sky is the limit! So don't be afraid to think outside the box or use items you already have.

There are a few things you will need for your coop:
Coop: The indoor area
Run: The outdoor area
Roost/Perch: A place for them to get off the floor
Nests: A place for them lay eggs
Feeder: For their food
Waterer: For their water
Ventilation: For fresh air

Here are just a few options:

Tractor Style
The benefit of a tractor style is that it is mobile. If you worry about chickens destroying one area of the yard, or if you want to provide the girls with fresh bugs and grass each day, this would be the coop for you.


 The Converted Shed
This is an easy option if you aren't into building something yourself.

 A Raised Coop
This coop would be good if you have limited space. The run (outside area) is underneath the coop taking up less real estate.

Straw Bale
The benefits of a straw bale coop would be that it has really good insulation, I don't know that I would recommend this type of coop without covering the straw with plaster, see the second strawbale image. 

This image is actually a little strawbale cottage, I just wanted to give you an idea of what a finished strawbale structure can look like.
It is my dream to have a beautiful strawbale chicken coop similar to this, but it isn't likely.

Be Creative


Pre-made
omlet.com


What type of coop do you have? What do you like about your coop?

Saturday, February 19, 2011

Reader's Question - Companion Planting

 Question:

What plants are best planted next to each other? We are planting our 'spring' garden here in AZ using the square foot gardening method. Thanks! -Alison

Answer
 There are a ton of different options, here are a few that I follow:

Tomatoes/basil to bring out the flavor of the tomatoes
Tomatoes/marigolds, marigolds fight off tomato pests
garlic next to lettuce, beets and cabbage for increased flavor

I think this companion planting chart is very easy to follow:

This is another good resource for companion planting:
click here
What companion plantings have you done or have found successful? 

~marisa

Friday, February 18, 2011

A seed variety to try

By Jennifer


What ARE those?

That's the question I got all summer when I shared these prickly yellow orbs from my garden with family and neighbors.
So let's slice one open, shall we?
What do you think now?

If you guessed cucumber, you're right on the money. "Lemon cucumber" to be exact, an heirloom variety dating back to the 1800s -- and we prize heirlooms here at Backyard Farming!
A lover of all things lemon-flavored, I plucked this seed packet from the store display just for the name. Even though I soon learned lemon has nothing to do with the cucumber's flavor, just its size and color, I will definitely plant it again this season. It is easy to grow and produces crisp, crisp, crisp flesh in abundance.

The cucumbers start pale green and mature to their namesake yellow when full size, about 3 to 4 inches. The picture of my bowl full of them represents one picking, and all this from one plant! I grew the plant on a trellis. At first I'd get a handful of cukes per harvest, then as summer continued I could get this many cucumbers at once, about every two weeks. 

A cucumber variety this prolific is perfect for pickling, and that's just what I did. I picked up a bread and butter pickle mix from the canning aisle at my grocery store, and it was a breeze. The package directions were to slice, combine mix with vinegar and sugar, heat, then can. No peeling required in that recipe. If you venture into pickling this summer, have all your ingredients and supplies on hand, THEN head to the garden. Cucumbers can lose their freshness quickly, so for best results make pickles as soon after harvest as possible.

Follow your recipe precisely.

As eager (practically stir-crazy!) as I am to start my garden again this year, I actually appreciate the season of evalulation and planning that winter offers. I'd love to learn from all of you. So tell us, what are some of your favorite seed varieties? 

Give me something else that will make people say, "What ARE those?" I get a kick out of that.

Thursday, February 17, 2011

Plan #2

My friend Megan and I discussed the idea of getting rid of the circular driveway and came up with an alternate plan, and I think I like this plan better.
  • Get rid of the circular driveway and make it the animal pasture
  • Line the straight driveway with trees (love this part)
  • Keep the orchard to the north of the house
  • Put the garden in the North West corner of the property (I worry a little about the wind)
  • Fill the South West corner of the property with wild flowers, native grasses, and herbs
Any suggestions on this plan? 

I have a library hold for the book The Backyard Homestead
This book has great ideas on how to set up your homestead, and even has different options for different size lots. Hopefully I will get even more great ideas on how to set up our property. 

Our Plans for the Backyard Farm-

Updated: 2 more pictures of the front yard


This is the birds eye view of our property, I have outlined it in red to make it easier to see. You will notice that a large portion of our property is in the front, and for right now we have to work around a circular driveway that takes up a large amount of space.  So we have to be creative. 

The front of the Property


Here are our ideas:
  • Plant our "bee feed" wild flowers in the center of the circular drive. 
  • Grapes will go along the fence at the front of the property.  
  • Raspberries, blackberries, and strawberries will line the fence to the north.  
  • The south end of the property we have an easement  that has to be unobstructed for bikes, 4 wheelers, and snowmobiles.  We have enough space to either line the easement with trees or maybe it would be a good spot for rows of corn. 
 Any other ideas for me?

Front Yard: 

I would like it to be somewhat similar to the front yard of my old house: 
A+B=C
  • The big tree in front is right over the poo tank, which is a HUGE "no no". So it will have to come down.
  • Door will be painted
  • Grass will be brought back to life
  • Hopefully I will have some beautiful flowers growing in the front as well. 
I've got a lot to do! 

Side Yard
 This is where we will put our fruit trees.
  • Peaches
  • Apples
  • Pears
  • Cherries
  • Plums
Back Yard
animals include chickens, goats, and bees.

current view of the backyard


This is what we dream of doing with the property.  If we can have all of it done in the next 3-5 years, I will be happy!

~marisa


Wednesday, February 16, 2011

Photography Workshop


I have another photography workshop coming up on Saturday March 26. If you are interested in attending, please click this link. 

Watch this funny video of people ordering chicken at their local restaurant. The ethical treatment of animals is important to me but this couple might take it a little too far.


Michael

Tuesday, February 15, 2011

Reader Question - Trash Can Potatoes

Question:  
How did the trash can potatoes turn out? We're going to try them this year - we've done them in the ground before, but are looking for something easier that takes up less space.

Answer:
How did they turn out? They didn't. We did quite a bit of reading online about how to do trash can potatoes, and followed the instructions to a T. We were so excited to harvest the bounty that we were so sure we would get, we searched through all the soil and found 3 measly little potatoes the size of a golf ball. We had planted more potato than we had harvested. My friend Megan tried trash can potatoes last year and had very similar results.

Has anyone had success with trash can potatoes? Or know of any techniques that take up less space?

Reader Question - Chickens in Cold Weather

Question

What about winter and backyard chicken coops? I live in Missouri and today is -7 degrees. What would I do with my chickens?  

Answer:
Wow, that's cold. If you check on backyardchickens.com, they have a breed list, it will tell you the breeds that are hardy and well suited for cold weather.  During the winter we use a heat lamp, it isn't essential here in Utah, it just helps keep the egg production up because they aren't using the majority of their energy to stay warm.  You can make sure that the coop isn't drafty and even insulate it. I know someone who stacks straw bales around the coop in the winter, then uses the straw for their bedding throughout the rest of the year.


If you have any other suggestions, please leave them in the comments.

Sunday, February 13, 2011

How to start seeds

FYI: Depending on where you live, it may not be the proper time for you to start seeds right now. I am in Utah and will not be starting the majority of my seeds until March 15th. Please check with your local extension agent to find out when you should start your seeds!


Seed starting really isn't that difficult. It can seem overwhelming if you haven't done it before. I know it took me a few years of gardening before I dared start my own seeds. It wasn't until my husband Michael said to me,

"If the pioneers that crossed these plains could put a seed in the ground and grow food without peat pots, a bag of seed starting soil, and a mini greenhouse container....we can do it WITH those things."

He was right, and my family is living proof of that. If WE can start plants, trust me YOU can do it too. You will see in the pictures that my kids did most of the work (aged 4, 6, 9).

Here is how!

Step 1: Gather Your Supplies


A. Seeds. We prefer heirloom seeds. We like the variety that is available in heirloom seeds, as well as the fact that we can harvest seeds from our produce to use the following year. Packets of seeds you buy from a big box store will be hybrids and the seeds can not be harvested. In the long run, this saves money as you don't have to purchase seeds each year. We purchase a few packets each year to add more variety to our garden.

B. Containers. Something to hold the soil and seeds. Here are a few options.

Pellets: These start as a small hard disk, when added with water they pop right up and you can place a seed in them. These are nice because they are easy to use and small so they don't take up a lot of space.
You can place them right into the soil when you are ready, you do not need to peel off the netting around them. The disadvantage is that they are quite small and I always have to plant them in something else (like a plastic cup) before planting them outside.


Peat pots: These are nice because they are a little larger. I still end up having to plant them into something else before planting outside. I like these better than the disks because I can write the name of the plant on them making it easier for me to keep track of what is planted in it. You can also place these right into soil and do not need to worry about damaging roots by pulling them out of the container. The disadvantage of these is that there is an extra step involved, they do not come with soil, so you have to fill them.  
Flats: This is a container that held flowers that I bought from a nursery the year before. I was careful to pull my flowers out without damaging the container. Make sure that you thoroughly clean a container that you are re-using. There could be a disease lingering on the container that would kill your starts. Fill with a seed starting mix, and I marked mine with popsicle sticks.


Be creative. We save our yogurt containers and bring home plastic cups from parties for seed starting. It makes gardening more economical that way. For even more creative and frugal seed starting containers, check out this article. If you are recycling something like a cup, be sure to poke some holes in the bottom for drainage. About 5-6 with a thumb tack should do the trick.

C. Soil. If you bought the little dehydrated disks, you can skip this step, just hydrate your disks.

If you didn't buy the disks, don't go out and buy a 50lb. bag of potting soil. Look for a seed starter mix. It will be very light and fluffy. You can now find this at major big box stores as well as garden nurseries.


Step 2. Fill Your Containers
I have found that it is easier if moisten your seed starter mix first because it has a tendency to shrink down the first time it gets wet. Get your mix wet, then put in whichever containers you choose. I like to write the name of the plant that will be going in the container before we put the mix in.


Step 3: Plant your seeds
The packet of seeds will tell you how deep to put your seeds in the soil. For those of us that have harvested seeds from the previous year and no longer have a seed packet, a good guideline is to bury them down about 3 times the width of the seed.

Step 4: Water
We have a few different ways to water. For the disks and peat pots that we put in the plastic greenhouse containers, we bottom water. Bottom watering is when you fill the bottom of the tray with water, and the soil sucks up the water from the bottom. For containers that we can't bottom water (yogurt and plastic cups), we use a spray bottle like Mason (aka. Bubba) is demonstrating below.


Step 5: Keep them Damp and Warm
If you bought a greenhouse container it is easy, just put the lid on and stick in a warm area. If you didn't, that is okay, just use a piece of plastic wrap to cover your seeds, this will help keep the humidity in. At this point, you don't need to stick them in the sun, you will want to keep them damp and warm (about 70 degrees). So maybe place them by a heating vent or the top of your fridge, or you can purchase heating mats. I have never used the heating mats and haven't had any problems getting my seeds to sprout.

Step 6: Stick Them in a Sunny Spot
Once your seeds have sprouted, you will want to move them to a sunny spot. In the early spring, our kitchen looks like a nursery, we have plants everywhere, and I love it.

We put some on a bench in front of the sliding glass door.


Some in the window sill.


And some in a seed starting rack, modeled after Jennifer's. Click here to read that article.


Step 6: Harden Off
Once your plants are big and beautiful, you just stick them in the ground and water them, right? Wrong.

This part can seem scary, but don't let it intimidate you. When in doubt, take longer to harden off.

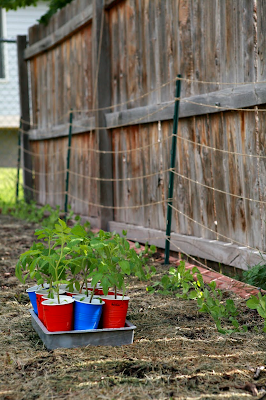
Your plants up to this point have had a cushy life. The temperature, humidity, and moisture, has been closely monitored. They have not experienced full sun, wind, or changing temperatures. Hardening off is the process of slowly getting them used to the environment they are going to move to. A typical hardening off at our home may go like this:

Day 1: Move plants outside in the shade for 2-4 hours on a nice day.
Day 2-5: Move plants outside for 2-4 hours in the shade and one hour in the sun making sure the weather isn't too cold or snowy.
Day 6-7: Move plants outside for 2-4 hours in the shade and 2-4 hours in the sun.
Day 8-10: Move plants outside for 2 hours in the shade and 6 hours in the sun.
Day 11-12 Move plants outside for 8 hours in the sun.
Day 13-14 Leave plants outside all day and all night in the area they will be planted. Be sure that the weather overnight won't be too cold or windy.

Hint: I like to set my alarm clock, so I don't forget to bring my plants back inside. I have fried my little plants before because I forgot to bring them in from the sun.

Step 7: Plant
Once your plants are properly hardened off, you can plant them in the ground just like you would had you bought them from the nursery. Congrats!


Enjoy the bounty that is sure to come!

Note:

There are some plants that you will not start indoors either because they won't transplant well, or because there is no need to. Some climates may be nice enough that you never have to start seeds indoors, that would be heaven! But, for Utah in order for us to get a full growing season, you have to start many plants indoors.

Some that you do not need to start indoors are, but not limited to: peas, beans, lettuces, beets, carrots, and onions.

Anyone have anything to add? Leave a comment!
~marisa